


Google Maps in your Flutter App
Integrating Google Maps SDK into our Flutter App to get locations with autocomplete and displaying a route between the 2 locations.


What we will build
We are going to make a simple Maps App which will have 2 Form fields with autocomplete from where the user can add 2 locations. Then we will display a PolyLine/Route between those 2 places on the GoogleMap Widget.
Requirements and Pre-Requisites
- A machine with Flutter installed
- Google account for Google Cloud Console
- Google Maps SDK
- Places API
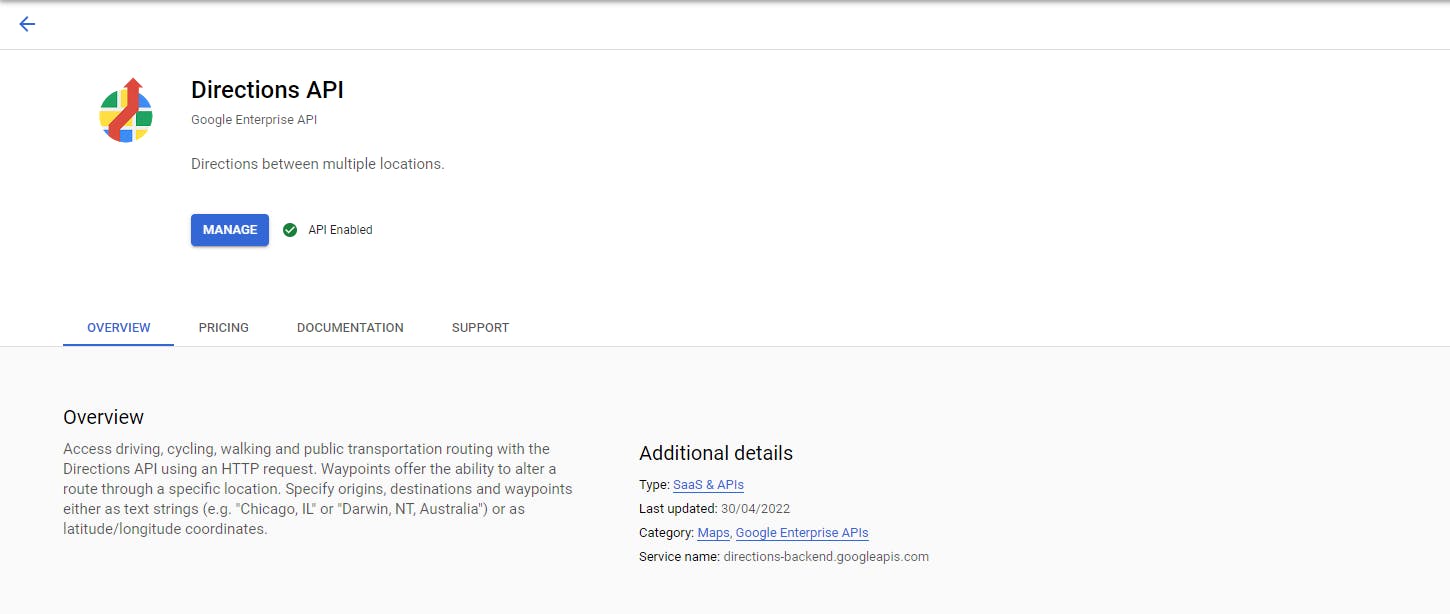
- Directions API
Getting Google Maps and Places API
We can get the "Google Maps API" from Google Cloud Console under the "APIs and Services" section. You will need to make a project once to use the Maps SDK.
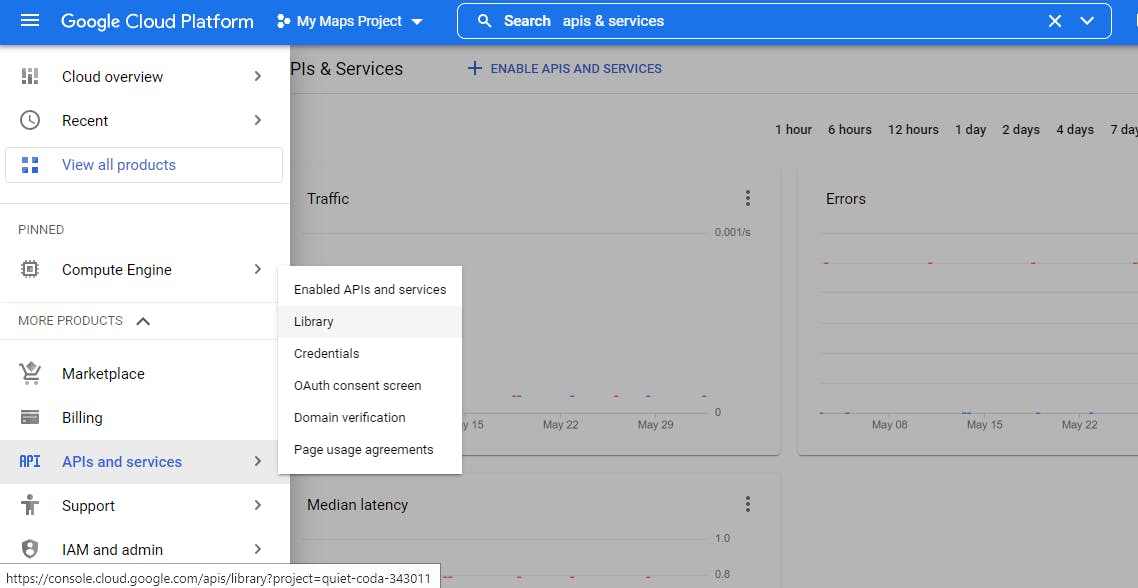
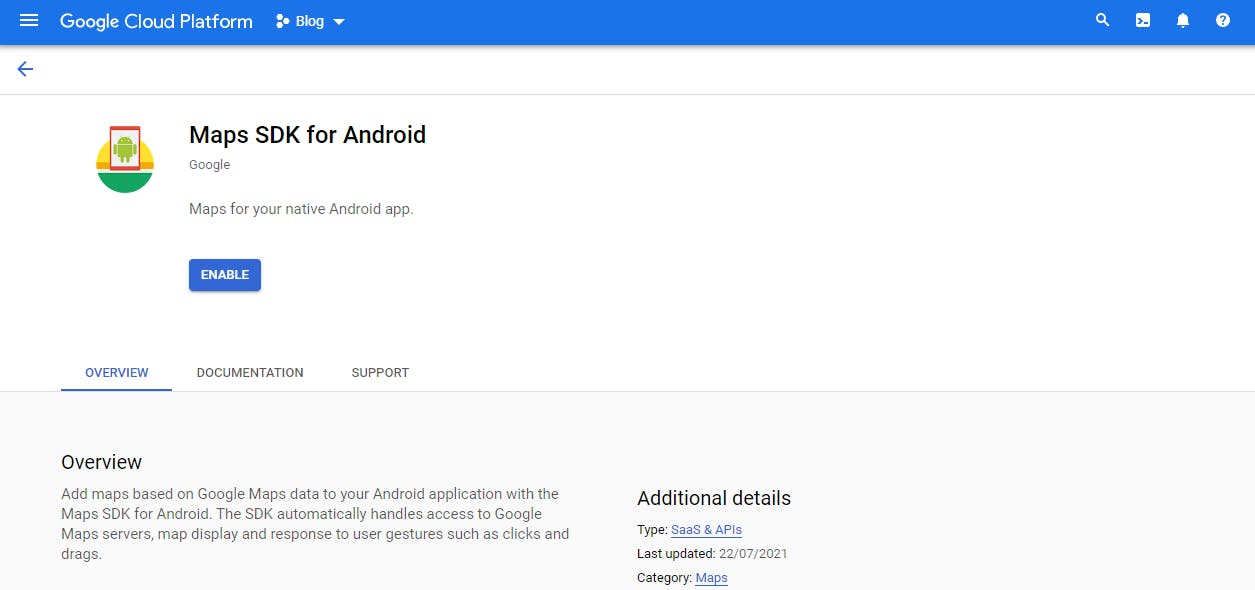
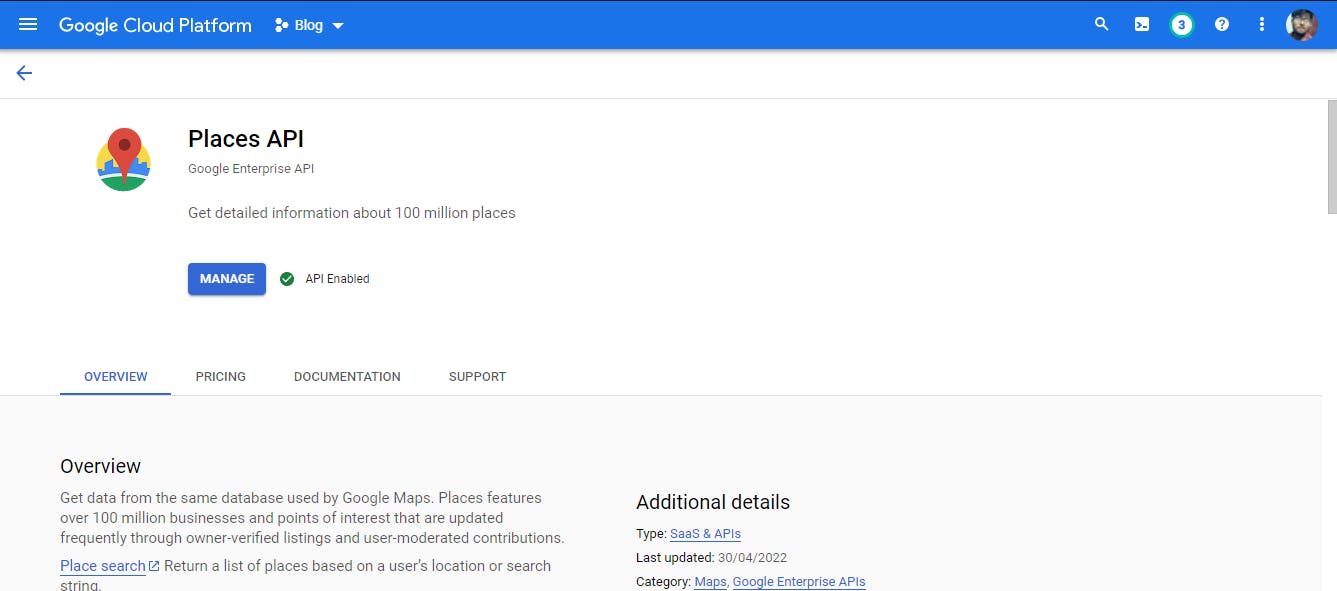
Click on Library and search for "Maps SDK for Android" and enable it. This will enable the API for our selected Project but we still haven't got the key to use this API. We also need to add the "Places API" similarly to get the predictions of locations.
Note: To use it on iOS, you also have to enable "Maps SDK for iOS" separately.
We can make our new key by going into Credentials and clicking "CREATE CREDENTIALS" and selecting "API key". A popup box will open with your required key.
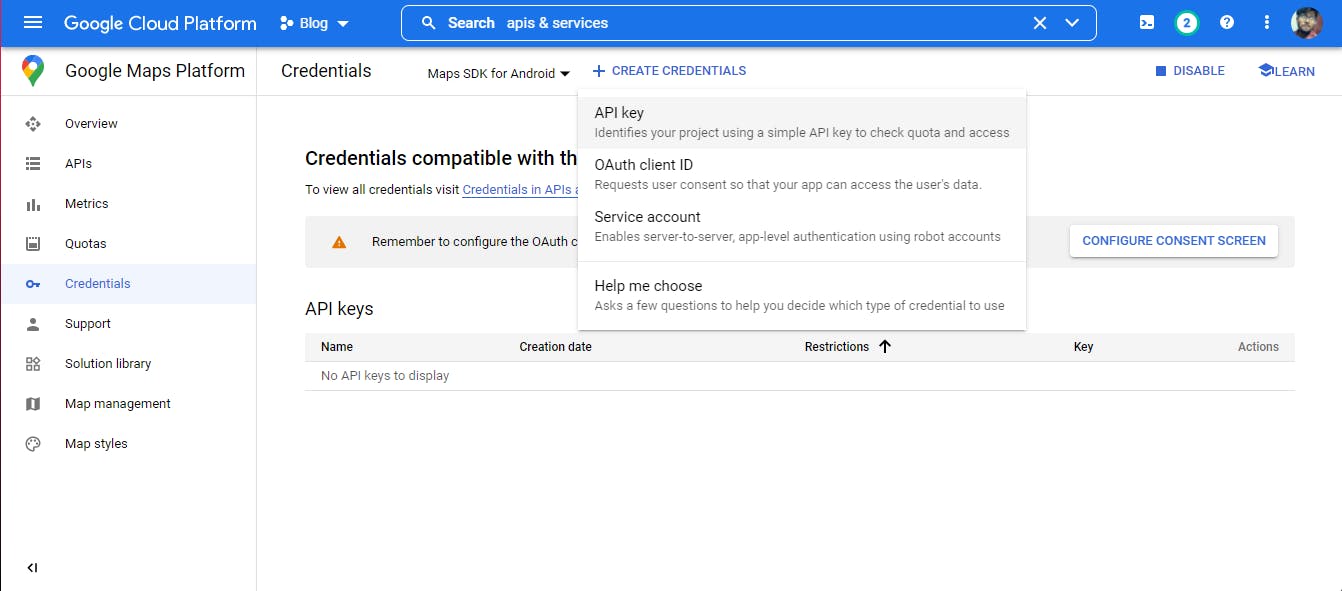
Voila! We got the API key and now let's move forward to implement it in our Flutter app.
Displaying a Map in our App
Let's build a flutter project and open it in an IDE. I'll be using VSCode for this blog. If you are also using VSCode, you can copy the commands below and paste them into your terminal.
flutter create maps_demo
cd maps_demo
code .
Let's open our project and save the API key into a ".env" file. You can create the ".env" file in your root directory of the project. Transform the main function into this to load the data from the ".env" file.
Future main() async {
  await dotenv.load(fileName: ".env");
  runApp(const MyApp());
}
We also have to add the API key to our AndroidManifest.xml file. Add this snipped into the manifest file and also your API key in the required field i.e. android:value.
<manifest ...
  <application ...
    <meta-data android:name="com.google.android.geo.API_KEY"
               android:value="YOUR ANDROID API KEY HERE"/>
You might also need to set the minSdkVersion to 21 in the app-level build.gradle file
Create a new page with Statefulwidget and define the following variables. We have taken New Delhi as the default location which will be displayed when the GoogleMap widget is rendered.
final Completer<GoogleMapController> _controllerGoogleMap = Completer();
GoogleMapController? _googleMapController;
static const LatLng _center = LatLng(28.61992743538245, 77.20905101733563);
Now we can add the GoogleMap widget to our body. The best way to implement the GoogleMap widget is to use it in a Stack widget.
GoogleMap(
  onMapCreated: (GoogleMapController controller) {
    _controllerGoogleMap.complete(controller);
    _googleMapController = controller;
  },
  initialCameraPosition: const CameraPosition(
    target: _center,
    zoom: 11.0,
  ),
)
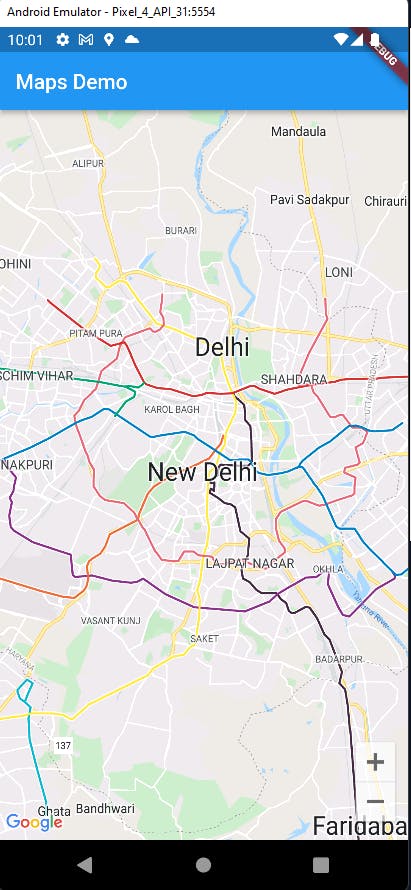
We have successfully added the map to our app. Let's work on adding some features to it.
Implementing Location Autocomplete
We will use the Places API to get predictions of the locations. We will use a TextForm widget to get the location queries from the user and a ListView widget to display the recommended places.
We will now need to add new variables for this, basically an empty list and GooglePlace object. Also, form an initstate to initialize the GooglePlace and all the late Objects.
List<AutocompletePrediction> predictions = [];
final _startingLocationController = TextEditingController();
final _endingLocationController = TextEditingController();
DetailsResult? startPosition;
DetailsResult? endPosition;
late GooglePlace googlePlace;
Timer? debounce;
late FocusNode startFocusNode;
late FocusNode endFocusNode;

@override
void initState() {
  super.initState();
  googlePlace = GooglePlace(dotenv.env['API_key']!);
  startFocusNode = FocusNode();
  endFocusNode = FocusNode();
}

@override
void dispose() {
  super.dispose();
  startFocusNode.dispose();
  endFocusNode.dispose();
  _googleMapController!.dispose();
}
Let's create a function to get predictions from a given value. The value will be taken from the TextEditingController and the predictions will maid according to it.
autoComplete(String value) async {
  var result = await googlePlace.autocomplete.get(value);
  if (result != null && result.predictions != null) {
    setState(() {
      predictions = result.predictions!;
    });
  }
}
Let's add a TextForm to get these values and call the function every time the value in it is changed. We will also make a similar form for taking the destination as well.
// TextForm for getting start location
TextField(
  focusNode: startFocusNode,
  controller: _startingLocationController,
  decoration: InputDecoration(
    suffixIcon: _startingLocationController.text.isNotEmpty
          ? IconButton(
              onPressed: () {
                setState(() {
                  predictions = [];
                  _startingLocationController.clear();
                });
              },
              icon: const Icon(Icons.clear_outlined))
          : null,
      fillColor: Colors.white,
      filled: true,
      prefixIcon: const Icon(CupertinoIcons.location_solid),
      hintText: 'Starting Location'),
  onChanged: (value) {
    if (value.isNotEmpty) {
      autoComplete(value);
    } else {
      setState(() {
        predictions = [];
        startPosition = null;
      });
    }
  },
),

// TextForm for getting end location
TextField(
  focusNode: endFocusNode,
  controller: _endingLocationController,
  decoration: InputDecoration(
    suffixIcon: _endingLocationController.text.isNotEmpty
        ? IconButton(
            onPressed: () {
              setState(() {
                predictions = [];
                _startingLocationController.clear();
              });
            },
            icon: const Icon(Icons.clear_outlined))
        : null,
    fillColor: Colors.white,
    filled: true,
    prefixIcon: const Icon(CupertinoIcons.location_solid),
    hintText: 'Ending Location'),
  onChanged: (value) {
    if (value.isNotEmpty) {
      autoComplete(value);
    } else {
      setState(() {
        predictions = [];
        startPosition = null;
      });
    }
  },
),
Now, we will make a ListView to show all the predictions. The user can then click on a list tile and the name of the place will be selected. The value of start and end will be selected based on FocusNode selected.
ListView.builder(
  shrinkWrap: true,
  itemCount: predictions.length,
  itemBuilder: (BuildContext context, int index) {
    return Padding(
      padding: const EdgeInsets.only(top: 4),
      child: ElevatedButton(
        onPressed: () async {
          final placeId = predictions[index].placeId!;
          final details = await googlePlace.details.get(placeId);
          if (details != null &&
              details.result != null &&
              mounted) {
            if (startFocusNode.hasFocus) {
              setState(() {
                startPosition = details.result;
                _startingLocationController.text =
                    details.result!.name!.toString();
                predictions = [];
                debugPrint('Name of Location is : ${_startingLocationController.text}');
                debugPrint('location is : $startPosition');
              });
            } else {
              setState(() {
                endPosition = details.result;
                _endingLocationController.text = details.result!.name!.toString();
                predictions = [];
              });
            }
            FocusManager.instance.primaryFocus?.unfocus();
          }
        },
        child: ListTile(
          leading: const CircleAvatar(
            child: Icon(Icons.pin_drop),
          ),
          isThreeLine: false,
          title: Text(
            predictions[index].description.toString(),
            maxLines: 2,
            overflow: TextOverflow.ellipsis,
          ),
        ),
      ),
    );
  },
),
Now, to prevent the recurring use of API all the time, we will use a debounce. Debounce is a timer which will wait for some time before sending a new request to the API. This helps reduce the cost of API usage. We will implement it in the onChanged state of both the TextForms.
onChanged: (value) {
  if (debounce?.isActive ?? false) debounce!.cancel();
  debounce = Timer(const Duration(microseconds: 1000), () {
    if (value.isNotEmpty) {
      autoComplete(value);
    } else {
      //clear the search
      setState(() {
        predictions = [];
        endPosition = null;
      });
    }
  });
}
Let's see how the app is working as of now.
Drawing a Route between 2 locations
To display a route between 2 locations, we use a PolyLine or a set of PolyLines and pass it to the GoogleMap widget. A PolyLine is a list of all the points between two points. We will need another API for it called "Directions API". Just activate it on your Google Cloud Console and you are good to go.
Now let's define some new variables to start implementing this feature.
Marker? _origin;
Marker? _destination;
List<Marker> markers = [];
Map<PolylineId, Polyline> polylines = {};
List<LatLng> polylineCoordinates = [];
PolylinePoints polylinePoints = PolylinePoints();
Polyline? polyline;
List<Polyline> polylineValues = [];
Now let's write a function to draw PolyLine on our map. We will pass two DetailResult objects to it which we got from both the TextForm.
drawPolyLine(DetailsResult start, DetailsResult end) async {
  polylines.clear();
  markers.clear();
  polylineCoordinates.clear();
  polylineValues.clear();

  _origin = Marker(
      markerId: const MarkerId('Origin'),
      infoWindow: const InfoWindow(title: 'Origin'),
      icon: BitmapDescriptor.defaultMarkerWithHue(BitmapDescriptor.hueGreen),
      position: LatLng(start.geometry!.location!.lat!, start.geometry!.location!.lng!));
  markers.add(_origin!);

  _destination = Marker(
      markerId: const MarkerId('Destination'),
      infoWindow: const InfoWindow(title: 'Destination'),
      icon: BitmapDescriptor.defaultMarkerWithHue(BitmapDescriptor.hueRed),
      position:  LatLng(end.geometry!.location!.lat!, end.geometry!.location!.lng!));
  markers.add(_destination!);

  await getPolyLine();

  _googleMapController!.moveCamera(CameraUpdate.newLatLngBounds(
      MapUtils.boundsFromLatLngList(
          markers.map((loc) => loc.position).toList()),
      1));

  polylineValues = List<Polyline>.of(polylines.values);

  setState(() {
    print('Length : ' + polylineValues[0].toString());
  });
}
This function will first assign two markers as Origin and Destination and add them to our markers list. We will assign the required position from the startPosition and endPosition. It will also clear all the previous lists so as to prevent multiple previously drawn lines from rendering again after the state change when the function is called again.
Let's write the getPolyLine() function which will draw the polyline from the given markers.
getPolyLine() async {
    PolylineResult result = await polylinePoints.getRouteBetweenCoordinates(
      dotenv.env['API_key']!,
      PointLatLng(startPosition!.geometry!.location!.lat!,
          startPosition!.geometry!.location!.lng!),
      PointLatLng(endPosition!.geometry!.location!.lat!,
          endPosition!.geometry!.location!.lng!),
    );
    if (result.points.isNotEmpty) {
      for (var points in result.points) {
        polylineCoordinates.add(LatLng(points.latitude, points.longitude));
      }
      _addPolyLine();
    }
  }
Here we will use the start and end point Latitude and Longitude to get the result from the "Directions API". If there is a result provided by the API, we will call the _addPolyLine() function to add the PolyLines to a list so that the GoogleMap widget can render it.
_addPolyLine() {
  PolylineId id = const PolylineId('poly');
  polyline = Polyline(
      polylineId: id,
      color: Colors.purple,
      points: polylineCoordinates,
      width: 3);
  polylines[id] = polyline!;
  setState(() {});
}
Now that we have the PolyLines between 2 locations. We can render the line in our GoogleMap. Now, let's form a button which will call the function drawPolyLine().
Align(
  alignment: Alignment.bottomCenter,
  child: Padding(
    padding: const EdgeInsets.all(8.0),
    child: ElevatedButton(
        onPressed: () {
          if (startPosition != null && endPosition != null) {
            drawPolyLine(startPosition!, endPosition!);
          }
        },
        child: const Text("Search")),
  ),
)
The function will only be called if both the startPosition and endPosition are not null. You can also add a Toast message to tell the user to add both locations.
In the function drawPolyLine(), there is a code snippet which will move the camera of GoogleMap to show both the markers.
_googleMapController!.moveCamera(CameraUpdate.newLatLngBounds(
        MapUtils.boundsFromLatLngList(
            markers.map((loc) => loc.position).toList()),
        1));
Here MapUtils is a class which will provide the LatLngBounds to move the camera to a proper camera location. We will make a new dart file named map_utils.dart and add this class to it.
import 'package:google_maps_flutter/google_maps_flutter.dart';

class MapUtils {
  static LatLngBounds boundsFromLatLngList(List<LatLng> list) {
    double? x0, x1, y0, y1;
    for (LatLng latLng in list) {
      if (x0 == null) {
        x0 = x1 = latLng.latitude;
        y0 = y1 = latLng.longitude;
      } else {
        if (latLng.latitude > x1!) x1 = latLng.latitude;
        if (latLng.latitude < x0) x0 = latLng.latitude;
        if (latLng.longitude > y1!) y1 = latLng.longitude;
        if (latLng.longitude < y0!) y0 = latLng.longitude;
      }
    }
    return LatLngBounds(
        northeast: LatLng(x1! + 0.5, y1! + 0.5), southwest: LatLng(x0! - 0.5, y0! - 0.5));
  }
}
Now we can update our GoogleMap widget to add the markers and polyline parameters.
GoogleMap(
  onMapCreated: (GoogleMapController controller) {
    _controllerGoogleMap.complete(controller);
    _googleMapController = controller;
  },
  initialCameraPosition: const CameraPosition(
    target: _center,
    zoom: 11.0,
  ),
  markers: {
    if (_origin != null) _origin!,
    if (_destination != null) _destination!
  },
  polylines: {if (polylineValues.isNotEmpty) polylineValues[0]},
),
Now, let's run the app again and see how is our app performing.

Our app is work is working perfectly!!
Conclusion
You can now easily add a simple map feature to any of your apps very simply on a single page. The code might seem to be long but it will provide all the necessary functions and features for the user and the app. You can also add more functionality and features using the markers and PolyLines for your use case. If you are reading this. Thank you for reading my blog, I hope it helped and clarified all the doubts regarding the topic.
GitHub Link
You can also check out the whole project on my GitHub.